Viking Professional 4 Slot Toaster, Black

Special Price!!! Viking Professional 4 Slot Toaster, Black

Oct 31, 2011 08:51:31

Viking Professional 4 Slot Toaster, Black
Click for larger image and other views

Viking Professional 4 Slot Toaster, Black

>> Click here to update Cheapest prices for Viking Professional 4 Slot Toaster, Black <<

Viking Professional 4 Slot Toaster, Black Feature

  • Slots are 1.4 inch wide and 5.4 inch deep. Wide slots to accommodate the toasting of larger items such as bagels
  • Slide-out crumb tray
  • Wipe clean with damp cloth
  • Easy-to-use control knob with multiple timer settings that include rewarm
  • 120-volts/1000-watts, Agency certified for home use


Viking Professional 4 Slot Toaster, Black Overview

The Viking professional-grade, four-slice toaster offers restaurant quality toast at home. The toaster is insulated to internally retain heat and maximize toasting. Crafted from stainless steel, it has wide slots to accommodate bagels, Texas toast and pastries. Hydraulic engaging and lifting action levers are part of the toaster's package along with Viking's exclusive design and tooling. In front is a large, easy-to-use control knob with multiple timer settings that include Rewarm. You'll have easy access to the stainless steel crumb tray which removes for cleaning.


SAVE NOW on the special offers below!

Available In Stock.

This Viking Professional 4 Slot Toaster, Black ships for FREE with Super Saver Shipping.

Price : Click to Check Update Prices Please.

Viking Professional 4 Slot Toaster, Black

Limited Offer Today!! Viking Professional 4 Slot Toaster, Black Black Friday and Cyber Monday Deals

G-Lite Stroller Logitech Dual Action Gamepad

Hamilton Beach 22708 Toastation 2-Slice Toaster and Mini Oven, Black

Special Price!!! Hamilton Beach 22708 Toastation 2-Slice Toaster and Mini Oven, Black

Oct 30, 2011 07:48:42

Hamilton Beach 22708 Toastation 2-Slice Toaster and Mini Oven, Black
Click for larger image and other views

Hamilton Beach 22708 Toastation 2-Slice Toaster and Mini Oven, Black

>> Click here to update Cheapest prices for Hamilton Beach 22708 Toastation 2-Slice Toaster and Mini Oven, Black <<

Hamilton Beach 22708 Toastation 2-Slice Toaster and Mini Oven, Black Feature

  • 2-in-1 compact toaster and mini oven saves on counter space
  • 2-slice toaster with 1-1/2-inch slot; oven fits up to 2 16-inch pizza slices
  • Electronic toast-shade and oven-temperature controls ensure consistent results
  • Slide function lever; automatic shut-off; removable crumb tray for quick cleanup
  • Measures approximately 17 by 9 by 9 inches; 1-year warranty


Hamilton Beach 22708 Toastation 2-Slice Toaster and Mini Oven, Black Overview

Hamilton Beach 2-slice extra wide 1.5" slot toaster with mini-oven . Unique bottom compartment bakes like an oven , perfect for flat foods, large enough to fit two large slices of pizza, two pop-tarts , or two 5" single serve pizzas. Includes auto-shut off & chrome accents.


SAVE NOW on the special offers below!

Available In Stock.

This Hamilton Beach 22708 Toastation 2-Slice Toaster and Mini Oven, Black ships for FREE with Super Saver Shipping.

Price : Click to Check Update Prices Please.

Hamilton Beach 22708 Toastation 2-Slice Toaster and Mini Oven, Black

Limited Offer Today!! Hamilton Beach 22708 Toastation 2-Slice Toaster and Mini Oven, Black Black Friday and Cyber Monday Deals

Dvd Theater Vizio 47 1080P 120Hz

TST240SS 2 Long Slot 4 Slice Digital Toaster

Special Price!!! TST240SS 2 Long Slot 4 Slice Digital Toaster

Oct 28, 2011 15:39:27

TST240SS 2 Long Slot 4 Slice Digital Toaster
Click for larger image and other views

TST240SS 2 Long Slot 4 Slice Digital Toaster

>> Click here to update Cheapest prices for TST240SS 2 Long Slot 4 Slice Digital Toaster <<


TST240SS 2 Long Slot 4 Slice Digital Toaster Overview

Attractively housed in brushed stainless steel%2C this digital toaster not only adds sophisticated style to any kitchen counter%2C but it also provides useful everyday convenience%2E The unit%27s two long slots easily accommodate longer slices of bread or up to four standard slices of bread at a time%3B the slots also offer an extra%2Dwide size%2C which allows for thick slices of homemade bread%2C bagels%2C English muffins%2C and more%2E To use%2C simply drop the item to be toasted into the slot%2C turn the dial to select the shade setting from light to dark%2C and start the toasting process by pressing down on the lever%2C which lowers the bread into the heating chamber%2E In addition to the shade%2Dsetting dial%2C the unit%27s side control panel features a digital display%2C which indicates both the shade setting and the toasting process%2C and three blue%2Dbacklit control buttons that make it easy to select the %22defrost%22%2C %22reheat%22%2C or %22cancel%22 function%2E The toaster also provides an integrated warming rack for heating croissants%2C buns%2C rolls%2C and other baked goods%2E Other highlights include high%2Dlift extension for safely removing smaller pieces of bread%2C a removable crumb tray%2C and cord storage to help keep countertops looking tidy%2E The toaster measures 7 by 14%2D2%2F5 by 7%2D1%2F5 inches%2E


SAVE NOW on the special offers below!

Available In Stock.

This TST240SS 2 Long Slot 4 Slice Digital Toaster ships for FREE with Super Saver Shipping.

Price : Click to Check Update Prices Please.

TST240SS 2 Long Slot 4 Slice Digital Toaster

Limited Offer Today!! TST240SS 2 Long Slot 4 Slice Digital Toaster Black Friday and Cyber Monday Deals

Saw Drill Logitech Mx Fine Tip Soldering Iron

Dualit 4-Slice Toaster, Red

Special Price!!! Dualit 4-Slice Toaster, Red

Oct 27, 2011 07:57:13

Dualit 4-Slice Toaster, Red
Click for larger image and other views

Dualit 4-Slice Toaster, Red

>> Click here to update Cheapest prices for Dualit 4-Slice Toaster, Red <<

Dualit 4-Slice Toaster, Red Feature

  • Color: Red
  • Size: 9"H x 14"W x 8"L
  • Hand made in England.
  • This toaster features extra wide 28 mm slots
  • Stainless steel body


Dualit 4-Slice Toaster, Red Overview

Dualit Chrome Retro Toaster. The Dualit Classic Toaster combines simplicity and sophistication. Designed for commercial use, the toaster is hand assembled in England and built to last, with an insulated stainless-steel body, variable controls and automatic turnoff. Extra wide 28mm slots accommodate a sandwich cage (not included) and the award-winning ProHeat elements, a patented design which increases toasting efficiency and element longevity. Every toaster has a removable crumb tray and an adjustable rear foot. 2-Slice Toaster: 10" L x 9" W x 8" H; 7 lbs. 4-Slice Toaster:14" L x 9"W x 8"H; 9 lbs.


SAVE NOW on the special offers below!

Available In Stock.

This Dualit 4-Slice Toaster, Red ships for FREE with Super Saver Shipping.

Price : Click to Check Update Prices Please.

Dualit 4-Slice Toaster, Red

Limited Offer Today!! Dualit 4-Slice Toaster, Red Black Friday and Cyber Monday Deals

Tft Lcd Color Monitor 46 Hdtv 1080P Whey Protein Fat Loss

Chefscape TEMPR 4-Slice Egg and Muffin Toaster

Special Price!!! Chefscape TEMPR 4-Slice Egg and Muffin Toaster

Oct 26, 2011 06:48:24

Chefscape TEMPR 4-Slice Egg and Muffin Toaster
Click for larger image and other views

Chefscape TEMPR 4-Slice Egg and Muffin Toaster

>> Click here to update Cheapest prices for Chefscape TEMPR 4-Slice Egg and Muffin Toaster <<

Chefscape TEMPR 4-Slice Egg and Muffin Toaster Feature

  • 4 Wide slots with High-Lift feature, Bagel and Defrost functions
  • 8 Egg Basket for hard-boiling eggs
  • Meat warming tray and 2 round/ 2 square egg poaching trays to customize shape to your bread of choice
  • Egg/Toast, Toast, and Egg Functions, allows steam poached eggs and toast to finish at the same time
  • Self-centering, Cool Touch, Crumb Tray, Wide Slots, Cord Storage


Chefscape TEMPR 4-Slice Egg and Muffin Toaster Overview

The 4-slice Chefscape Egg and Muffin Toaster makes the perfect toast and breakfast sandwiches for both of you, or hard boils up to 8 eggs - in minutes.


SAVE NOW on the special offers below!

Available In Stock.

This Chefscape TEMPR 4-Slice Egg and Muffin Toaster ships for FREE with Super Saver Shipping.

Price : Click to Check Update Prices Please.

Chefscape TEMPR 4-Slice Egg and Muffin Toaster

Limited Offer Today!! Chefscape TEMPR 4-Slice Egg and Muffin Toaster Black Friday and Cyber Monday Deals

Lcd 40 Inch Classy Halloween Decor

How to Easily Create Stylish Celebrity Hairstyles For the Office

Hair trends may come and go, but this season we're lucky enough to have three great looks to go to work with - there's short and sweet, long and textured and bobbed to perfection. And with the New Year upon us and spring only a couple of months away, it's the perfect time to try a new look.

4 Slice Toaster

Just take a look at the celebs to see this season's styles in action. Dannii Minogue pulls off the perfect Parisian bob - cheeky and sharp, it's the fashionista's hair cut for the season ahead. And whether you're dark or blonde, it's a style winner. If you've been blonde for a long time, trying a shade of chocolate from light and milky to dark and moody might just be the way to go! Try the new handbag-sized Andrew Barton Gloss Boss Super Shine Serum to make sure your hair glistens all day.

4 Slice Toaster

Pixie Geldof wears the cutest of crops. It's trendy, just a little bit edgy but sweet at the same time, and when worn textured, it's a great look for those with smaller frames and features. Try the Andrew Barton Hold It Right There Hair Spray to fix the hair into place, perfect in a handbag size, too.

Cheryl Cole hits all the right buttons with her tousled and textured mane. Gone are the extensions and in their place a sexy, ruffled look just past the shoulders. It's bang on trend and looks gorgeous. For girls with longer locks, keep hair moisturised and in great condition and health with the Andrew Barton SOS range.

Up-dos

The answer to great up-dos, from perfect pony tails to plaits, is all in the prep

Pony tails- a classic style, but very much back in fashion.

Use a styling product like Andrew Barton I Love Volume Mousse before blow-drying. The mousse gives fantastic holding power to the hair and protects it from the elements. It also gives a great fibrous texture, making the hair easy to work with. Blow-dry the hair with a paddle brush, working through it section by section to get polish and smoothness. Once the hair is dry, apply a tiny drop of Andrew Barton Gloss Boss Shine Serum. Rub it between the palms of your hands and gently pull your hair back off the face, raking your fingers through your hair to distribute the serum. This will seal any split ends and even out the texture, ensuring your hair is super smooth. Carefully brush your hair with the paddle brush to create the perfect polished finish. Decide where you want the pony to hang - either perched high at the crown or low on the neck - and brush the hair into place. Secure the hair with a Blax hair band rather than a rubber band as they're kinder to the hair. Catch any stray hairs with a tiny drop of Gloss Boss for the final polish.

Plaits- bang on trend, whether they're worn loose, tight or used to create texture.

Prepare your hair before plaiting with a styling product like Andrew Barton's Big Hair Lifting Juice, which gives the hair a brilliant boost and creates texture, too. Use plaits randomly to secure hair away from the face - taking a section either side of the parting is a casual way of dressing hair without it looking like you've tried too hard. Don't use a comb, just your fingers and make sure the plait either side is a different size and plaited loosely. Secure the ends of the plaits with a Blax hair band or a piece of cotton. Then dress with accessories, depending on the occasion. Use plaits to create sexy, rippled and textured hair without blow-drying or setting. Take six large sections around the head and randomly plait them. If hair is wet, either sleep in the plaits or use a hairdryer to dry the hair. Unravel the plaits and loosen the hair with your fingers.

Accessories

Combined with pretty hair accessories, having a pony tail or plaits is a great look for the spring. Try tying brightly coloured threads, ribbons and yarns into your hair, using the look inspired by Madonna for her hit Holiday and Cyndi Lauper during the 1980s.

Textured waves - perfect for long hair

Waves are easy to create, from beach-style waves to glam retro waves, but the secret is ensuring that the hair is not too curly and in good condition.

For shiny, healthy waves, ensure your hair is top condition by treating it to a deep-conditioning mask twice a week. Try Andrew Barton's SOS Treat Me Deeply Hair Mask - just leave it in for three minutes, rinse and you'll be left with shiny, frizz-free tresses. Apply Andrew Barton Frizz Tamer Styling Crème to wet hair down the whole length, plus a few drops of Andrew Barton Gloss Boss Shine Serum to the ends to add shine and definition. Use regular or conical-barrelled tongs for maximum effect on blow-dried smooth hair. Wrap the hair around the tong horizontally rather than vertically to get a great wave effect. For beach-style waves like the Olsen twins, take damp sections of hair (five to six sections should be enough) and coil them into a big 'O' shape. Pin to the head and use a hairdryer to set the hair. Once the hair is dry, take the pins out and unravel the hair with your fingers. Apply Andrew Barton Straight Answer Hot Iron Protective Spray and then use a diffuser or tongs to enhance the waves - it will also protect your hair against the weather and help your waves last longer.

The finishing touches

Whatever your style, add a little product to complete the look. It will make all the difference, giving you that shiny, just-so salon finish. Try Andrew Barton Hold It Right There Hair Spray and Gloss Boss No Frizz Shine Serum, now available in handy smaller sizes that are just perfect for your handbag, so you can look good all day whether you're at work or play.

How to Easily Create Stylish Celebrity Hairstyles For the Office
4 Slice Toaster

Special Price!!! Cuisinart Dual Control 4 Slice Toaster

Oct 24, 2011 17:53:41

Cuisinart Dual Control 4 Slice Toaster
Click for larger image and other views

Cuisinart Dual Control 4 Slice Toaster

>> Click here to update Cheapest prices for Cuisinart Dual Control 4 Slice Toaster <<

Cuisinart Dual Control 4 Slice Toaster Feature

  • Separate Control Panels for more Toasting Options
  • 6-Settings Browning Dials for Ultimate Shade Control
  • Bagel, Defrost, and Reheat Controls with LED Indicator
  • Innovative Design with Elegant Metal Finish Accents
  • Slide-out Crumb Tray, Instruction Book


Cuisinart Dual Control 4 Slice Toaster Overview

Make the most of your toast. Dual controls give you two toasters in one, allowing you to simultaneously prepare two different servings. Each side gives you a nine-setting browning control, while a selection of touchpad controls help you specify the type of toasting - defrost, bagel and cancel. A slide-out crumb tray catches any refuse for easy cleanup.


SAVE NOW on the special offers below!

Available In Stock.

This Cuisinart Dual Control 4 Slice Toaster ships for FREE with Super Saver Shipping.

Price : Click to Check Update Prices Please.

Cuisinart Dual Control 4 Slice Toaster

Limited Offer Today!! Cuisinart Dual Control 4 Slice Toaster Black Friday and Cyber Monday Deals

Cordless Drill Lithium Ion

Cuisinart CPT-180MR 4-Slice Classic Metal Toaster, Metallic Red

Special Price!!! Cuisinart CPT-180MR 4-Slice Classic Metal Toaster, Metallic Red

Oct 23, 2011 15:32:34

Cuisinart CPT-180MR 4-Slice Classic Metal Toaster, Metallic Red
Click for larger image and other views

Cuisinart CPT-180MR 4-Slice Classic Metal Toaster, Metallic Red

>> Click here to update Cheapest prices for Cuisinart CPT-180MR 4-Slice Classic Metal Toaster, Metallic Red <<

Cuisinart CPT-180MR 4-Slice Classic Metal Toaster, Metallic Red Feature

  • Dual control panels make this two toasters in one with smooth brushed stainless housing with polished chrome and black accents
  • Custom control: Two 6-setting browning dials, dual reheat, defrost and bagel buttons with LED indicators
  • 1-1/2 inch - wide toasting slots, extra-lift carriage lever, slide-out crumb tray
  • Convenient cord wrap
  • Instruction book


Cuisinart CPT-180MR 4-Slice Classic Metal Toaster, Metallic Red Overview

Cuisinart's Metal Classic toaster has a smooth brushed stainless housing with polished chrome and black accents. Its custom controls let you defrost and toast bagels and bread, four at a time-just the way you want them.


SAVE NOW on the special offers below!

Available In Stock.

This Cuisinart CPT-180MR 4-Slice Classic Metal Toaster, Metallic Red ships for FREE with Super Saver Shipping.

Price : Click to Check Update Prices Please.

Cuisinart CPT-180MR 4-Slice Classic Metal Toaster, Metallic Red

Limited Offer Today!! Cuisinart CPT-180MR 4-Slice Classic Metal Toaster, Metallic Red Black Friday and Cyber Monday Deals

8 Inch Tv Monitor

Cuisinart Dual Control 4 Slice Toaster

Special Price!!! Cuisinart Dual Control 4 Slice Toaster

Oct 22, 2011 13:42:40

Cuisinart Dual Control 4 Slice Toaster
Click for larger image and other views

Cuisinart Dual Control 4 Slice Toaster

>> Click here to update Cheapest prices for Cuisinart Dual Control 4 Slice Toaster <<

Cuisinart Dual Control 4 Slice Toaster Feature

  • Separate Control Panels for more Toasting Options
  • 6-Settings Browning Dials for Ultimate Shade Control
  • Bagel, Defrost, and Reheat Controls with LED Indicator
  • Innovative Design with Elegant Metal Finish Accents
  • Slide-out Crumb Tray, Instruction Book


Cuisinart Dual Control 4 Slice Toaster Overview

Make the most of your toast. Dual controls give you two toasters in one, allowing you to simultaneously prepare two different servings. Each side gives you a nine-setting browning control, while a selection of touchpad controls help you specify the type of toasting - defrost, bagel and cancel. A slide-out crumb tray catches any refuse for easy cleanup.


SAVE NOW on the special offers below!

Available In Stock.

This Cuisinart Dual Control 4 Slice Toaster ships for FREE with Super Saver Shipping.

Price : Click to Check Update Prices Please.

Cuisinart Dual Control 4 Slice Toaster

Limited Offer Today!! Cuisinart Dual Control 4 Slice Toaster Black Friday and Cyber Monday Deals

Vitamins Herbal Toaster Logitech Touch Mouse

My Funniest Online Dating Horror Stories

Yeah, yeah. It's absolutely true that online dating worked out pretty well for me, ultimately. But having given it some thought, I wanted to come clean with you about something. It's not like every single date was a blissful stream of perfection.

4 Slice Toaster

Sure, I met lots of great women and had a blast for several years...culminating in meeting Emily on Match.com. But along the way, especially at the beginning, I certainly encountered my share of sometimes hilarious and sometimes downright nightmarish situations.

4 Slice Toaster

Here are the four most memorable ones:

1) Not What The Doctor Prescribed

Very shortly after my divorce in 1992, I received a "spam" message in my inbox that I actually responded to. Believe it or not, I hadn't even heard of online dating before. This ad claimed I could meet the woman of my dreams on their site, so I was intrigued.

The next thing you know, I had ponied up however much they charged and began looking through the pictures of women they had listed.

To be honest, this was not exactly the most well-traveled site on the 'net. Who knew there was a Match.com out there? So inevitably, I found exactly one woman who seemed interesting to me-a brown-eyed blondie with a friendly smile.

I emailed her, probably with something lame like "You seem nice. Maybe we could get along. Would you like to talk?". Remember, this was Day One for me in the online dating world.

Call it "beginner's luck, but she wrote back. Crazy, huh?

Well, one thing led to another, and there we were sitting across the table from one another at dinner. The fact that I shouldn't have been paying for dinners here has long since been duly noted and is sort of beside the point, so please overlook that for now and read on.

Midway through dinner, she starts talking about her medical problems.

Never talk about your medical problems on a first date. I don't care if you've known the person for ten years, let alone ten minutes.

Between bites of whatever I was eating, she was bragging about how she had chronic kidney stone issues and how tough she was for being able to pass them without even flinching nowadays.

Unfortunately, she took my casual attempt to divert the discussion as disbelief.

"You don't believe I get kidney stones? Here...look..."

Already having started digging in her purse, she soon produced a small medicine vial.

I thought to myself, "This chick has to be kidding. I believe her, already. She doesn't have to prove her case by showing me her prescription."

I should have been so lucky.

Pressing down and twisting the child-proof cap, the bottle opened and the contents were soon poured into her hand.

"See, look at this...it has to be at least the size of a pea, right?"

With a freshly French-manicured thumb and forefinger, she produced the largest unit from an impressive collection of similar objects she was holding.

Yes. It was the largest kidney stone she had ever passed.

This woman collected her kidney stones. And she took them with her everywhere, apparently.

I don't remember what I said or did, really. But I do remember there was a second date, believe it or not.

2) Not A Strip Mall, Sweetie

Not long after the "kidney stone chick", I met another woman from the same site. She was a Hispanic cutie with perfect skin and a booty that would have made Sir Mix-A-Lot slam on the brakes. She said "sweetie" a lot.

I hadn't learned the part about not taking women to expensive dinners on first dates yet, so there were at one of the nicer sushi joints in San Antonio.

She was terrific. She was intelligent and loved to laugh. Above and beyond that, she was a great flirt. Clearly she was digging me.

We had ordered two glasses of red wine, and conversation turned to what she did for a living.

"So you said you were 'self-employed'. What exactly do you do?", I asked.

While she answered, I took a sip of Merlot. And it was right then that I discovered that all those slapstick "spit takes" you see on old-school comedy sketches are rooted in factual reality.

It took all I had in reserve not to spew grape juice all over everything.

"I run a chain of strip clubs, Sweetie.", she had announced matter-of-factly.

Sitting before me was a decidedly classy woman, who I had picked up from a decent home in a nice neighborhood.

"You mean, like a strip mall...right...with the nail salons, a tanning place and a Chinese restaurant."

"No, silly! LOL! I mean like...you know...strip clubs. The kind with girls."

Now if you know my style at all by now, you already realize the date was as good as over.

Yet, it was like a train wreck. I couldn't look away.

And I asked the inevitable question.

"Yes, well...my ex ran the day-to-day operations and I pretty much handled the books. But he let the 'interview process' go a little too far too often, and I couldn't trust him anymore. I got the business in the divorce settlement."

It was then, I told her the truth.

"I've never been to one of those places in my life, and I see no reason to start now."

Uh oh.

I may has well have lit a roman candle. That chick practically attacked me as soon as we left the restaurant. I tried to handle things as best as I knew how at the time, but let's just say she wasn't a happy camper.

When I got home, she had already e-mailed me the buck-naked pics from her "Adult Friendfinder" profile (which was my first introduction to that particular reality). "This is what you missed out on. GOOD LUCK!!!" was the only line accompanying the pics.

3) June Carter Cash Or Charge

I should have known better, considering the one pic she had attached to her profile was a blurry one.

And in my heart of hearts, I really did know better. Suspecting this particular date may not go so well, I invited her to dinner (yeah, yeah...hardheaded wasn't I?) at 5.30p.

I walked into the Chili's or TGIFridays or whatever it was, and immediately got that nauseous feeling that every single online dater experiences at one point or another. Specifically, the one where you see someone waiting alone at a table over there who vaguely resembles the person you were expecting to meet about as much as a piece of burnt toast resembles the perfectly good slice of bread you threw in the toaster and forgot about.

My honest-to-goodness first thought was, "OMG...who replaced the woman with the nice smile in the profile with June Carter Cash!"

I was too much of a "Mr. Nice Guy" to turn tail and skip town immediately, so I gathered my intestinal fortitude and approached the table.

Conversation was stilted from the very beginning. She began to make a feeble attempt at flirting.

The woman was at least 55 years old. And not a very attractive 55-year-old at that.

She was dressed in solid black stuff with lots of stainless steel crap and fringes on it, like she was some dust-farting legend from "The Grand Ole' Opry" or something.

The thickness of her Texas accent was eclipsed only by the thickness of her black eyeliner.

Finally, she excused herself to the ladies room, offering me a blessed reprieve from impending regurgitation.

It was then the waiter came to the table asking me if I wanted another beer. "NO!" I proclaimed, soon apologizing for the brusque tone neither he nor I had anticipated.

"OK, um...how about your mom?

"What?"

"Would your mom like another beer?"

Suddenly reminded that one must take oneself much less seriously in order to derive the greatest enjoyment out of life, I burst out laughing.

I was still recovering when Mrs. Cash returned to the table.

Having ordered a small garden salad (after all, who could eat?), my focus pretty much turned to saying as little as possible in hopes that she would friggin' finish eating.

I had already called for the check and ended up excusing myself to go find the waiter and pay it, already.

Finally, leaving, I parted ways with her at the table and wished her well. There was no way I was going to risk the awkwardness of walking her to her car. My inherent sense of chivalry was in fact overwhelmed by utter disgust, without apology.

Arriving home at the advanced hour of 6:30, I was greeted once again by a "post date" e-mail. In her vitriolic message to me, Mrs. Cash had "charged" me with a series of offenses that clearly roused her deepest sense of hurt and anger. Among the more particularly hilarious ones was the pronouncement that I was "obviously gay" because I failed to see her as attractive.

Were she the last woman on earth, she may have been right about that.

Incidentally, I finally learned my lesson and quit that particular dating site...forever.

4) Cook For Your Drunk

She was a very cute kindergarten teacher of Lebanese ethnicity. She was also a total sweetheart. Realizing her pics consistently got 9.5s on HotOrNot.com, I threw the dice and let her come to my place so I could cook for her.

There were no disappointments. She was exactly my type. And she was already being touchy/feelie/smiley enough that I knew this was going to go really well.

I mixed her an "Apple-tini".

"Oh my! This is GOOOD!" she said. Noticing her glass was empty, I refreshed it for her.

The glass was empty again the next time I looked over at her. Right then, making eye contact with her, she skipped over to me, threw her arms around my neck and started biting me with a giggle.

This chick was perhaps 110 pounds with a full tank of fuel. (in other words, she was probably 110 pounds at that moment). So I decided maybe two drinks were enough.

But nevertheless, when I wasn't paying attention she had found some raspberry stuff in my stash and had begun mixing vodka with it.

Ten minutes later, dinner was finished...and it was spectacular, if I may say so myself.

But she was nowhere to be found.

It was then I remembered she had excused herself to the bathroom.

I went to check on her and she had vomited (thankfully with tremendously accurate aim) into the commode, and was presently passed out on the floor. Whatever.

Managing to wake her up, her groggy self agreed to let me carry her to the bedroom and let her sleep it off...which she did.

I ate dinner alone, watching SportsCenter. The Spurs had lost, no less.

She woke up 8 hours later, found me asleep on the couch, and had made me breakfast by the time I woke up. It was a great breakfast. She clearly had a sense that I was a man whom she could feel safe with. There was a second date.

Obviously, I learned some things from my early online dating misadventures. My evening with he Lebanese cutie actually happened about six months before I met Emily, so that only proves you gotta stay on your toes at all times. Actually, that one was probably less of an "online dating disaster" per se and more of an issue of guarding my liquor stash from pent-up school teachers!

My Funniest Online Dating Horror Stories
4 Slice Toaster

Special Price!!! Proctor Silex 24605 4-Slice Toaster

Oct 21, 2011 12:04:26

Proctor Silex 24605 4-Slice Toaster
Click for larger image and other views

Proctor Silex 24605 4-Slice Toaster

>> Click here to update Cheapest prices for Proctor Silex 24605 4-Slice Toaster <<

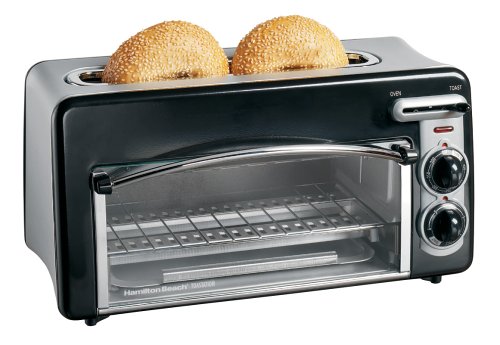
Proctor Silex 24605 4-Slice Toaster Feature

  • Auto Shutoff
  • Wide Slots
  • Snap open crumb tray
  • Auto toast boost


Proctor Silex 24605 4-Slice Toaster Overview

Cool-wall sides. Auto shutoff. Shade selector. Performance-tested for durability and reliability. Cool-Wall Sides: Won't burn hands if sides are touched accidentally. Lifts slices high with automatic toast boost. Auto shutoff and shade selector. Proctor Silex toasters are rigorously tested for durability and reliability, so you get perfect toast, slice after slice. UL listed. Made in China.


SAVE NOW on the special offers below!

Available In Stock.

This Proctor Silex 24605 4-Slice Toaster ships for FREE with Super Saver Shipping.

Price : Click to Check Update Prices Please.

Proctor Silex 24605 4-Slice Toaster

Limited Offer Today!! Proctor Silex 24605 4-Slice Toaster Black Friday and Cyber Monday Deals

Logitech Speaker Contours Options Tandem Stroller Wireless Audio

Cuisinart CPT-120 Compact Cool-Touch 2-Slice Toaster, White

Special Price!!! Cuisinart CPT-120 Compact Cool-Touch 2-Slice Toaster, White

Oct 20, 2011 08:07:37

Cuisinart CPT-120 Compact Cool-Touch 2-Slice Toaster, White
Click for larger image and other views

Cuisinart CPT-120 Compact Cool-Touch 2-Slice Toaster, White

>> Click here to update Cheapest prices for Cuisinart CPT-120 Compact Cool-Touch 2-Slice Toaster, White <<

Cuisinart CPT-120 Compact Cool-Touch 2-Slice Toaster, White Feature

  • Compact 2-slice toaster with LED indicator lights and 9 browning levels
  • Touchpad controls offer cancel, reheat, defrost, and bagel settings
  • 1-1/2-inch-wide slots automatically adjust to accommodate bagels and muffins
  • High-rise carriage; slide-out crumb tray; convenient cord wrap; instruction book included
  • Measures approximately 10 by 5 by 6-1/2 inches; 3-year limited warranty


Cuisinart CPT-120 Compact Cool-Touch 2-Slice Toaster, White Overview

Cuisinart Compact 2-Slice Toaster Smaller than standard toasters, the white Cuisinart Compact 2-Slice Toaster is streamlined and specially designed to sit sideways or facing forward on kitchen counters. The LED touchpad controls and 9-setting LED backlit browning dial are within easy reach in either position the toaster is in. The toaster features 1 1/2-inch wide toasting slots, an extra-lift carriage lever, a slide-out crumb tray, a convenient cord wrap, and it includes an instruction book. Limited three year warranty. Features: Compact design, white Custom control: LED 9-setting browning dial, LED reheat, defrost, and bagel touchpad controls 1 1/2" side toasting slots Extra-lift carriage lever Slide-out crumb tray Convenient cord wrap Instruction book Model: CPT-120


SAVE NOW on the special offers below!

Available In Stock.

This Cuisinart CPT-120 Compact Cool-Touch 2-Slice Toaster, White ships for FREE with Super Saver Shipping.

Price : Click to Check Update Prices Please.

Cuisinart CPT-120 Compact Cool-Touch 2-Slice Toaster, White

Limited Offer Today!! Cuisinart CPT-120 Compact Cool-Touch 2-Slice Toaster, White Black Friday and Cyber Monday Deals

Ipod Speaker Station Dutch Ovens Sonos Radio

Seven Awesome Kitchen Gadgets

Everyone who cooks can use some of these practical, time saving kitchen tools. While you can get by with a bare bones kitchen and a few old pots and pans, a lot of dishes are harder to make or more time consuming to prepare. The items in this list can free up some of your time, help you make delicious meals, store leftovers and even make the kitchen a fun place. So without further ado, here are some of my favorite kitchen gadgets. I hope you like them.

4 Slice Toaster

1. Bread Maker

4 Slice Toaster

Imagine getting up in the morning to the smell of freshly baked bread, ready for you to take out of the machine and slice up for toast or for lunch sandwiches. And all you had to do was load the ingredients the night before, then set the timer.

2. Automatic Coffee Maker

This goes well with the bread maker. Add coffee grounds and water, set the clock and have coffee waiting for you when you stumble out of bed in the morning. Rise and shine!

3. High Quality Knife Set

I used to make do with an old set of mismatched knives given to me without a knife block. Some of the handles were loose, and they had to be stored in a drawer. The new set sits on the counter top. The edges stay sharp longer, and the set contains knives for most needs. More room in the drawer, too.

4. Plastic Food Containers

With a set of containers for food storage, saving leftovers is much easier. Many have lids with vents, for use in microwaves. Another way to use them is to freeze food for future use. They look better than old margarine and yogurt containers, too.

5. Immersion Blender

These hand-held gadgets can be placed in large drinking glasses, pots, or mixing bowls. You can mix drinks, baking ingredients, gravies or even whip potatoes. They take up less space and are easier to clean than traditional blenders as well.

6. Toaster Oven

A toaster oven can cook toasted items with toppings, like garlic bread and mini pizzas, as well as make toast. Small baking projects are possible too, if you don't want to or can't use a larger oven.

7. Sandwich Grill

For grilled cheese, tuna melts and patty melts, these grills seal the edge of the sandwich so cheese and other things can't leak out.

These are some of the kitchen gadgets I like to use myself. For the larger items, maybe you can borrow one to test drive it before you buy. That is what I did with the bread maker. Our food containers, coffee maker and hand blender see daily use, and the toaster oven and sandwich grill once or twice a week. All in all, a good investment for my family. Happy cooking!

Seven Awesome Kitchen Gadgets
4 Slice Toaster

Special Price!!! Cuisinart CPT-140 Electronic Cool Touch 4-Slice Toaster, White

Oct 19, 2011 07:33:28

Cuisinart CPT-140 Electronic Cool Touch 4-Slice Toaster, White
Click for larger image and other views

Cuisinart CPT-140 Electronic Cool Touch 4-Slice Toaster, White

>> Click here to update Cheapest prices for Cuisinart CPT-140 Electronic Cool Touch 4-Slice Toaster, White <<

Cuisinart CPT-140 Electronic Cool Touch 4-Slice Toaster, White Feature

  • 4-slice toaster with 2 independent LED touchpad controls
  • 1-1/2-inch-wide toasting slots; extra-lift carriage levers for removing smaller items
  • Functions consist of Bagel, Defrost, Reheat, and Cancel; 9-setting LED backlit browning dials
  • Slide-out crumb tray for quick cleanup; cord wrap; instruction book included
  • Measures approximately 12-4/5 by 11-2/7 by 8-2/7 inches; 3-year limited warranty


Cuisinart CPT-140 Electronic Cool Touch 4-Slice Toaster, White Overview

Cuisinart Compact 4-Slice Toaster Smaller than standard toasters, the white Cuisinart Compact 4-Slice Toaster is streamlined and specially designed to sit sideways or facing forward on kitchen counters. The LED touchpad controls and 9-setting LED backlit browning dial are within easy reach in either position the toaster is in. This toaster has two sets of controls that let you toast at different settings at the same time. It also features 1 1/2-inch wide toasting slots, an extra-lift carriage lever for each side, slide-out crumb trays for each side, a convenient cord wrap, and an instruction book. Limited three year warranty. Features: Compact design, white Custom control: LED 9-setting browning dial, LED reheat, defrost, and bagel touchpad controls 1 1/2" side toasting slots 2 extra-lift carriage levers 2 slide-out crumb trays Convenient cord wrap Instruction book Model: CPT-140


SAVE NOW on the special offers below!

Available In Stock.

This Cuisinart CPT-140 Electronic Cool Touch 4-Slice Toaster, White ships for FREE with Super Saver Shipping.

Price : Click to Check Update Prices Please.

Cuisinart CPT-140 Electronic Cool Touch 4-Slice Toaster, White

Limited Offer Today!! Cuisinart CPT-140 Electronic Cool Touch 4-Slice Toaster, White Black Friday and Cyber Monday Deals

Daily Vitamin Supplements Corn Popper xbox 360

KitchenAid KMT411CU 4-Slice Toaster, Countour Silver

Special Price!!! KitchenAid KMT411CU 4-Slice Toaster, Countour Silver

Oct 18, 2011 02:45:49

KitchenAid KMT411CU 4-Slice Toaster, Countour Silver
Click for larger image and other views

KitchenAid KMT411CU 4-Slice Toaster, Countour Silver

>> Click here to update Cheapest prices for KitchenAid KMT411CU 4-Slice Toaster, Countour Silver <<

KitchenAid KMT411CU 4-Slice Toaster, Countour Silver Feature

  • Bagel Button
  • High lift lever for easy access.
  • Extra-Wide 1-1/2-inch Slots
  • Toast/Cancel buttons
  • All-metal construction


KitchenAid KMT411CU 4-Slice Toaster, Countour Silver Overview

The KitchenAid 4 Slice Toaster features an attractive metal housing that gives the toaster durability and style that you’ll love displaying on your countertop.


SAVE NOW on the special offers below!

Available In Stock.

This KitchenAid KMT411CU 4-Slice Toaster, Countour Silver ships for FREE with Super Saver Shipping.

Price : Click to Check Update Prices Please.

KitchenAid KMT411CU 4-Slice Toaster, Countour Silver

Limited Offer Today!! KitchenAid KMT411CU 4-Slice Toaster, Countour Silver Black Friday and Cyber Monday Deals

Tivo Usb Adapter 32 Inch 1080P Saute Pan

Beautiful Ceramic Tile Work is Possible For the Beginner

Anyone with a little care and patience can install beautiful ceramic or glass tile work. You will find that with a little care in layout of the tile, choosing the right color combinations and sizes of your tile and then carefully installing the tile can result in work that you will be proud to show off to your friends and you can save large sums of cash as an extra bonus.

4 Slice Toaster

TOOLS AND MATERIALS REQUIRED - Paper pad, pencil, measuring tape, 2" level, chalk line, tile cutter (you may rent one by the day at most rental stores or buy an inexpensive one for less than ), sponges, bucket for clean water, bucket for mixing grout, grout, pre-mix tile adhesive, latex (rubber) gloves and a sponge float or two and a water bucket.

4 Slice Toaster

LAYOUT - Start with a small project. Perhaps a countertop or backsplash in the kitchen or perhaps a sink backsplash in the bathroom. Using a pad and pencil sketch the surface you are going to apply tile to and measuring each dimension of the work. A typical area sketch will show all dimensions from wall to wall, floor to ceiling for whatever surface where you are going to install tile. Keep your measurements accurate. Tile is expensive so limit your waste.

COUNTERTOP - The countertop must be very stable and solid. A double layer of ¾ plywood or ceramic tile cement backer board and a layer of ¾" plywood is a minimum. Cement backer board is available under different trade names but is especially made for ceramic tile. Make sure it is secured properly. Cutting can be done with a power saw and carbide blade but causes a great deal of dust so cut it outside and use safety glasses and a dust mask. Backer board in sink areas is recommended.

For this example, we are going to install tile on a kitchen countertop. When we measure the countertop area, we find it is 2'-0" (24") deep or wide and 10'-0" (120") long. A little math tells us we have 20 square feet (SF) of surface to work with. (2'x10'=20'). Now we pick out our tile. The most common kitchen countertop ceramic tile size is 4 1/4" x 4 ¼" but you may use any size tile you would like. Tile comes in 12" x 12", 1" x1" (mosaic), 6" x 6", 8" x8" and even larger tiles are available. Some countertops are done in broken tile pieces to create a really different design of your own. Off to the store we go. You will find dozens of sizes and colors to choose from at most tile stores, and large retail home stores. Making this choice can sometimes be the hardest part of this job. Purchase the tile you like and get 20SF plus 2SF extra for special cuts. If you have chosen a stock tile, you can always go back and get a few more pieces to finish. If you have chosen a close-out or special sale tile, get plenty (perhaps 30SF) as there may not be any left when you go back. Purchase all the other supplies at this time. The salesperson can help you figure out the amount of adhesive and grout you need but all packages have approximate square footage of coverage on them.

INSTALLATION - Start by dry laying the tile on the countertop. Place full pieces at the front edge and working to the back of the counter. If you find you have a very small piece at the back, say ½" wide, try spreading out the tile a little to increase the grout joint width to take up this space. You do not want to try and install these tiny pieces of tile. Do the same for the length of the top. If you find you have approximately a ½ tile or more at the back of the top that's great. It is the least seen part of the countertop. Once you set your toaster, blender, bread box and can opener on the counter, the back edge almost disappears. Using your 2' level as a straightedge, make a pencil line from front to back and square to the front edge of the counter. If you have a 2' framing square this is the time to use it. Just place one leg against the front of the counter and the other leg will be square. Make sure the trim along the front edge of the counter is nailed tightly and is level with the top of the tile. Front trims are usually wood but counter edge tiles are available if you like that look. Purchase enough lineal footage of edge tile to go end to end of the counter top. If you are using edge tile, these will be the first pieces installed. Edge pieces come in 6", 8" and custom lengths but is not recommended to try and line them up with the countertop tiles. Starting with a ½ tile, install the edge tiles from one end to the other. A support ledger should be installed under the bottom leg of the tile as a temporary support until the adhesive dries. Spread some adhesive along side the pencil mark you made for the square line. Spread only a little at first until you get used to the time it takes to install the tile and the setting time for the adhesive. You don't want to try and remove dried adhesive. As you place the tile, twist the tile slightly to assure you have full contact with the adhesive below.

Ok, you placed the first 6 tiles. Are the lines straight? Are the tops of the tiles level and even? Are the spaces between the tiles all the same? Plastic spacers are available for various widths of grout spaces and are a good idea for your first project but your eye is usually the best way to judge this. For a short time, you can move the tile around to get the best spacing. Now go ahead with the rest pf the tile making sure you do not place adhesive where the cut tile will go. A small spackle knife can easily remove any adhesive accidentally spread into those areas. Return the adhesive to the bucket ONLY IF IT'S clean! You don't want dirt or other debris in your adhesive as it will make a bump under your other tile. You will find it gets easier and easier. Install all your full tile first. Take another good look at your work. Are the tile joints straight from end of end of the counter? Adjust them now. Tile cutting is really easy but try a piece as a sample. Measure the space you have for the cut tile and deduct the width of your grout joints. Carefully mark the tile and place it in the cutter. Follow the cutter instructions. You will find it does not take a great deal of pressure on the handle to score the tile. Press on the handle and it will snap the tile on your score mark. Practice a little. (remember the extra tile you bought?) Don't get upset if you crack a few or the tile does not snap on your mark. They are cast ceramic and contain air bubbles and other imperfections that sometimes causes them to crack unevenly. Install the cut pieces but hand "buttering" (placing the adhesive on the backs of the tile) and placing them one by one until you have them all installed. Clean all you tools carefully. It is almost impossible to remove dried adhesive. Check over your work and make sure you did not leave adhesive sticking up out of any joint or on the face of the tiles. Using a damp sponge and your spackle knife, carefully remove any excess adhesive. Let the tile dry 24 hours.

GROUTING - Grout comes in both sanded and non-sanded types. Sanded types are intended for use where you have larger grout joints such as floors. Non-sanded is generally for walls and countertops. Mix your grout in a small, paper bucket available at paint or hardware stores. You will most likely want to throw it away when you are done. Grout also comes in many colors with color being the choice of the buyer. You should not however use a white grout in kitchen counters as food stuffs, oils and other kitchen items can quickly stain it. Try to stay to a darker color. Leave white for the bathroom. There are grays, pewter, off-whites and other colors than will compliment your tile color. You may want to wear gloves for this part as grout can stain your skin. Some people are allergic to latex so rubber gloves are also fine. Place a small amount of the mixed gout on the tile. Yes, right on top of the tile. Using your sponge float, push the grout down into the joints working at a 45 degree angle to the joints as much as possible. You will find you will have to push and prod the grout into corners and edges but it's all technique. You will quickly develop one of your own. Scrape the excess grout off the tile with the edge of the sponge float. Make sure the joints are all filled and are slightly below the top of the tile just a little bit. Never leave it above the top of the tile. Work a small area at a time. As you work, keep an eye on the completed areas. They will quickly develop a haze over the tile from the drying grout. Do not leave this haze on tile. It will be extremely hard to remove later if possible at all. Using your bucket of clean water and another clean sponge (6"-8" long is best) gently wipe the excess grout that has dried on the tile being careful not to wipe the grout out of the joints again at a 45 degree angle to the joints when possible. You will have to repeat this cleaning 2-3 times to get it all off the tile but eventually the haze will stop appearing. Remember, do not wipe the grout out of the joints. You can use your sponge to reshape damaged joints or place a little grout somewhere you missed but timing is everything. If done while the grout is still wet, you will never see this touchup work. Once all the grout is installed and wiped clean, you are done. Let the grout dry for at least 24 hours before cleaning the countertop or placing items upon it.

WALL TILE- Wall tile installation is basically the same as a countertop with a few exceptions. Ceramic tile on walls must be installed on either water resistant drywall (green board) but cement backer board is amuch better job. Tile generally is subject to high water use around sinks and toilets for example, so a water resistant backer is important. Shower areas MUST have cement backer board for long life of your wall. We mentioned the use of tile spacers and this is a good place for them. They will help keep the tile from sliding down, closing the grout joint while the adhesive is still wet. Joint spacers come loose in a package or sometimes on a card connected with those little plastic ends like model airplane parts. Just snap them off as you use them placing one or two in each joint. Once the adhesive dries, you can pull them out and use them again and again. Layout remains the same as before. In this case you want your cut pieces to be at the floor on top of the baseboard. This is least viewable area. If you are using ceramic tile baseboard, install these pieces first making sure they are level across the entire wall. Make your plumb starting line as before and start your tile along this line to assure straight vertical lines. Step back often and admire your work. Make sure the grout line spaces are straight!

CUTTING-Cutting small pieces of tile is the same as a countertop. Use your tile cutter. Once you encounter an outlet box however, these require a little extra work. If you are very lucky the outlet box is between two tile or at the edge of one tile. You can cut the sides of the box using a carbide blade and grinder or a portable ceramic tile saw. (These are also available at your rental store by the day). Cut the sides first and the score the top of the box mark. Using a pair of square jawed pliers, grip the tile firmly and snap out the piece. WEAR YOUR GLOVES AND SAFTEY GLASSES! Small chips and grinding dust can easily cause an eye injury. Ok, you broke the tile. Try again. When you get one done the rest will be easy. The cover plate will cover any space around the outlet as long as you keep the cut fairly close. Test fit the tile dry. If it fits and the cover will cover the gaps, go ahead and install it. Circles are a little harder. These can be made with a grinder if they are large enough circles but for small circles a Dremel tool or drill with a carbide drill bit works best. You can drill a series of holes along the line as close together as possible and then snap out the remaining piece. Using the grinder or Dremel, grind away any parts that need to be removed to get the finished opening. Test fit it dry first. These are the basic items you will encounter in a wall project. Grouting is the same as a countertop. Work small areas, be careful to remove the haze as you proceed and do not wipe out the grout joints. Tiles can also be installed at a diagonal to the walls to make the room appear larger or create visual interest.

FLOORS-Floor tiles are generally 12' x12" but come in other sizes as well. Special made pieces such as emblems, decorative plaques and borders are all available to be included in your floor layout. Layout is a little different for a floor than a wall or countertop. You want to hide the cuts if at all possible under the toe kicks of the base counters. At the same time you want the tile to appear evenly spaced within the room. Starting at the entrance doorway, mark the centerline of the door opening and chalk a line across the entire room square to the doorway. Now measure from the layout line to each side wall. Does the tile work out to even tile? Does it work out to equally sized cut pieces? That would be ideal. A persons eye tricks them into thinking that if the tile line in the middle of the door they entered is centered and straight, the whole floor is centered and straight. There is nothing wrong if you have different sized pieces on each side. With cabinets the fridge and other appliances, the edges are barely visible but the center of the floor is always visible. Once again, dry lay some tile from your layout line at the doorway centerline to the walls. Take a good look. Is this what you want to see when it is finished? If it is, go ahead and start the installation following all the guidelines for walls and counters as to how to proceed. Tile joints in floors are always wider than walls or countertops. 3/8" joints are common but I have seen ½" joints that look great. It is your decision as to what you want to see. You are also going to use sanded grout for your floors. It is stronger than un-sanded grout and the sand adds extra strength to the grout for the larger joints. You will use LOTS of grout for a floor compared to a countertop. The use of ¾' power drill and grout mixer paddle is recommended but you can hand mix it. It is a lot of hard work. Placement of the grout is the same, work small areas, cleaning the tile as you go and so on. Keep off the finished tile for at least 24 hours. It may look dry but it is not. Walking on un-dried adhesive can twist a tile out of line and look terrible forever. Chiseling out a hardened tile and resetting it is no fun at all.

CRACKED TILE-I will touch on these for a moment as these styles are coming into use more and more each day. Cracked tile tops are made with bits and pieces of many different tiles that you have gathered or purchased at your local tile store. If your are looking for a mixed color top of red and green, get some red and green tiles that are the colors you like and we will break them. You can mix lots of colors for a true random colored mosaic looking piece. Place the tiles in a good paper sack and place it on the floor (preferably not ceramic). Use your sidewalk. Wearing your safety glasses and gloves strike the tile with a hammer breaking them into small pieces. Keep checking the bag. Pieces ½" to 1" are great but the smaller the pieces are, the more pieces you have to install. Smaller pieces will give a more mosaic like look and can be well worth the effort. With your prices ready, draw the pattern or rough picture you are trying to create. If you are trying totally random, just make sure the colors are well mixed. If you are creating a picture or distinct pattern, apply your tile adhesive directly onto the piece of tile and then place it. This will keep your layout lines visible and allow you stop work whenever you tire. The rest of the installation is the same as other tile work. Work clean and keep your tools clean. Let your work dry well before applying grout.

MOSAIC TILE- Mosaic tile comes from the factory glued to an often sized 12" x 18" plastic grid sheet as a base to hold dozens of tile at once. When installing mosaic tile on a floor or wall, this saves hours of labor in that you can set 12" x 18" of tile at once and not have to apply each 1 x1" tile by itself. When doing custom work, you want to install each tile one at a time. The tile will simply snap off the sheet or you may use a razor knife to slice off sections to infill your pattern perhaps 2,10 or 20 pieces at a time. Mosaic tile is used by artists and craftsmen worldwide to create beautiful pieces of work from pottery to wall and floor designs or a picture to hand on the wall for decoration. The designs are limitless and are limited only by your imagination. Mosaic tiles are very, very hard but can still cut with great care. When working with small pieces be careful when using power tools to cut the pieces and keep your fingers away from the blade. Always, always use your safety glasses and gloves. Cut tile can leave very sharp edges to cut you. A gentle rubbing of the tile edge on sandpaper will help remove this sharp edge. HINT-Watch in your local tile store or home center for busted boxes or odd sheets of tile people have returned. You maybe able to get a great price on these far less than retail and the stores clean up the mess. It can provide you with a far greater choice of colors to work with without having to stock whole sheets of odd colors. Create away!

A few extra hints. There are various products on the market for waterproofing your tile grout joints. Most are silicone based products that are applied with a brush or self-contained roller applicator. These do work but need upkeep by the reapplication of the silicone to maintain the seal. Oft times, the silicone discolors from cleaning agents or sunlight and does become unattractive. It is difficult to remove in these cases so caution should be used in using them. Keeping the joints clean and the occasional touchup of the grout should be all that is needed for long life.

With practice you can create some rather outstanding ceramic tile work. There is no limit what you can do with designs, colors, or even pictures within your tile work. Try it!

We have covered the basics of ceramic tile setting along with helpful hints on safety and buying. Keep you safety glasses and gloves handy and use them! Eyes cannot be replaced! Good luck with your projects.

Pete Your Friendly Building Inspector

http://www.Wagsys.com

BICES-Building Inspection & Code Enforcement Software

Beautiful Ceramic Tile Work is Possible For the Beginner
4 Slice Toaster

Special Price!!! Oster 6330 Inspire 4-Slice Toaster, Brushed Stainless Steel

Oster 6330 Inspire 4-Slice Toaster, Brushed Stainless Steel
Click for larger image and other views

Oster 6330 Inspire 4-Slice Toaster, Brushed Stainless Steel

>> Click here to update Cheapest prices for Oster 6330 Inspire 4-Slice Toaster, Brushed Stainless Steel <<

Oster 6330 Inspire 4-Slice Toaster, Brushed Stainless Steel Feature

  • Toaster with 2 extra-wide, long slots accommodates up to 4 slices of bread
  • Automatic centering guides; 7 adjustable shade settings; LED display lights
  • Bagel setting; frozen-to-toast function; keep-warm option; cancel button
  • High-lift lever for removing smaller items; removable crumb tray; recipes included
  • Measures 15-3/4 by 6-1/2 by 7-3/5 inches; 1-year limited warranty


Oster 6330 Inspire 4-Slice Toaster, Brushed Stainless Steel Overview

2 Slice stainless steel 4 slice long slot toaster with food select buttons, blue LED display lights


SAVE NOW on the special offers below!

Available In Stock.

This Oster 6330 Inspire 4-Slice Toaster, Brushed Stainless Steel ships for FREE with Super Saver Shipping.

Price : Click to Check Update Prices Please.

Oster 6330 Inspire 4-Slice Toaster, Brushed Stainless Steel

Limited Offer Today!! Oster 6330 Inspire 4-Slice Toaster, Brushed Stainless Steel Black Friday and Cyber Monday Deals

Led Lcd Television Cordless Tool Slide Projector Bulb

Your Guide to the Perfect Breakfast Sandwich

Everyone needs a good breakfast to start the day, but most people do not know how to do it right. This little guide will teach you how to make a quick, delicious breakfast on the go, without wasting money on greasy, fattening fast food concoctions.

4 Slice Toaster

Preparation is under ten minutes, it will not leave you with that queasy feeling you get from a convenience store breakfast burrito.

4 Slice Toaster

1. Ingredients (substitute comparable items as necessary)

one bagel, any variety one egg two strips of turkey bacon one slice of your favorite cheese (cheddar or provolone recommended) small cup of mild salsa (or spicy, for the daring ones)

2. Begin toasting the bagel (the rest should be done by the time it is ready). The bagel should be a light golden brown, not burnt on any sides.

3. Fry the bacon strips in a shallow saucepan on high heat for a short amount of time, taking them out just before they get crispy. Flip them frequently so they do not get a chance to burn on either side. Set on a paper towel to cool and absorb the grease.

4. Beat the egg in a small cup or bowl until it is a consistent yellow color. Add a dash of milk or cream to fluff it up a bit if desired.

5. Fry the egg in the drippings from the turkey bacon (this gives it an excellent flavor, and is healthier than butter). Keep the size compact so that it will fit easily on the bagel.

6. Just before the egg is finished, lay the cheese on top and allow it to sit for about ten seconds. The cheese will soak into the egg in a delicious flavor combination.

7. Pop your bagel out of the toaster, lay the egg and cheese on top, followed by the bacon. Scoop a little bit of salsa on top of the bacon, then close the deal with the other half of the bagel.

Grab a glass of orange or grapefruit juice, and you are good to go! Not only does this light breakfast taste amazing, but also it is also much healthier than many alternatives. Turkey bacon is a fantastic substitute for pork products, while maintaining the same taste beloved by many.

Prepackaged breakfasts are created with marginal meat products and reconstituted powdered eggs, which are no comparison to the real thing. This breakfast provides you with a healthy dose of protein, good fatty acids, and just enough kick of carbs to sustain you through to lunch. Enjoy!

Your Guide to the Perfect Breakfast Sandwich
4 Slice Toaster

Dewalt Cut Off Copper Cookware