How to Design and Layout a Coffee Shop Or Espresso Bar

If you are planning to open an espresso bar/coffee shop, then developing an efficient store design and layout will be one of the most important factors in positioning your business for success.

4 Slice Toaster

Speed of service is critical to the profitability of a coffee business. An efficient ergonomic store design will allow you to maximize your sales by serving as many customers as possible during peak business periods. Even though your business may be open 12 to 16 hours a day, in reality, 80% of your sales will probably occur during 20% of those hours. Coffee is primarily a morning beverage, so your busy times of day (those times when you are most likely to have a line of waiting customers), may be from 6:30AM to 8:30AM, and then again around lunchtime. If you have a poor store layout, that does not provide a logical and efficient flow for customers and employees, then the speed of customer service and product preparation will be impaired.
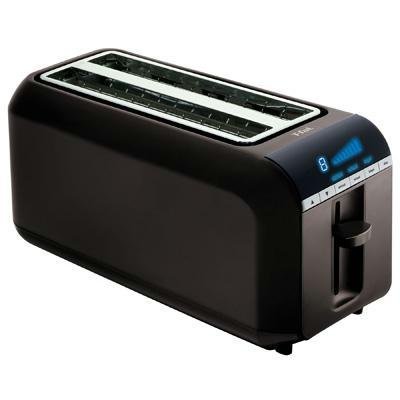
4 Slice Toaster

Think of it like this; if someone pulls open the front door of your store, and they see 5 people are waiting in line to order, there's a good chance they'll come in, wait in line, and make a purchase. But, if they see that 20 people are waiting in line, there is a high probability that they may determine that the wait will be too long, and they will simply get coffee somewhere else. This is money that just escaped your cash register! And, if they come to your store multiple times, and frequently find a long line of waiting customers, they may decide you are not a viable option for coffee, and will probably never return. Poor design slows down the entire service process, resulting in a longer line of waiting customers, and lost sales. So in reality, your daily business income will be dependent upon how many customers you can serve during peak business periods, and good store design will be essential to achieving that objective!

The financial impact of a poor store design can be significant. For the sake of this example, let's say the average customer transaction for your coffee business will be .75. If you have a line of waiting customers each morning between 7:00 AM and 8:30 AM, this means you have 90 minutes of crunch time, in which you must drive through as many customers as possible. If you can service a customer every 45 seconds, you will serve 120 customers during this 90 minutes. But, if it takes you 1 minute 15 seconds to service each customer, then you will only be able to serve 72 customers. 120 customers x .75 = 0.00 x 30 business days per month = ,500. 72 customers x .75 = 0.00 x 30 business days per month = ,100. This represents a difference of ,400 in sales per month (,800 per year), coming from just 90-minutes of business activity each day!

So how should you go about designing your coffee bar? First, understand that putting together a good design is like assembling a puzzle. You have to fit all the pieces in the proper relationship to each other to end up with the desired picture. This may require some trial and error to get things right. I've designed hundreds of coffee bar over the past 15 years, and I can truthfully tell you from experience, it still usually takes me a couple of attempts to produce an optimal design.

The design process begins by determining your menu and other desired store features. If you plan to do in-store baking, then obviously you'll need to include in your plan an oven, exhaust hood, sheet pan rack, a large prep table, and perhaps a mixer. If you plan to have a private meeting room for large groups, then an extra 200 sq. ft. or more will need to be designed-in, in addition to the square footage you are already allocating for normal customer seating.

Your intended menu and other business features should also drive decisions about the size of location you select. How many square feet will be required to fit in all the necessary equipment, fixtures, and other features, along with your desired seating capacity?

Typically, just the space required for the front of the house service area, (cash register, brewing & espresso equipment, pastry case, blenders, etc.), back of the house (storage, prep, dishwashing and office areas), and 2-ADA restrooms, will consume about 800 sq. ft. If space for extensive food prep, baking, coffee roasting, or cooking will be required, this square footage may increase to 1,000 to 1,200, or more. What ever is left over within your space after that, will become your seating area.

So, a typical 1,000 sq. ft coffee bar, serving beverages and simple pastries only, will probably allow for the seating of 15 to 20 customers - max! Increase that square footage to 1,200 sq. ft., and seating should increase to 30, or 35. If you plan to prepare sandwiches, salads, and some other food items on site, 1,400 to 1,600 sq. ft. should provide enough space to seat 35 to 50, respectively.

Next, you will have to determine the tasks that will be performed by each employee position, so that the equipment and fixtures necessary to accomplish those tasks can be located in the appropriate places.

Normally, your cashier will operate the cash register, brew and serve drip coffee, and serve pastries and desserts. Your barista will make all your espresso-based beverages, tea, chai, hot chocolate, Italian sodas, as well as all the blender beverages. If you'll be preparing sandwiches, panini, wraps, salads, snacks and appetizers, or will be baking on-site, then a person dedicated to food prep will be necessary. And, if you anticipate high volume, and will be serving in or on ceramics, a bus-person/dishwasher may be a necessity.

After you have determined what you will be serving, the space you will be leasing, and what each employee will be responsible for, you will then be ready to begin your design process. I usually start my design work from the back door of the space and work my way forward. You'll need to design in all of the features that will be necessary to satisfy your bureaucracies and facilitate your menu, before you make plans for the customer seating area.

Your back door will most likely have to serve as an emergency fire exit, so you'll need a hallway connecting it with your dining room. Locating your 2-ADA restrooms off of this hallway would make good sense. And, because delivery of products will also probably occur through your back door, having access to your back of the house storage area would also be convenient.

In the back of the house, at minimum, you will need to include a water heater, water purification system, dry storage area, back-up refrigerator and freezer storage, ice maker, an office, 3-compartment ware washing sink, rack for washed wares, mop bucket sink, and a hand washing sink. Do any food prep, and the addition of a food prep sink and prep table will be necessary. If doing baking, gelato making, full cooking, or coffee roasting, all the equipment necessary for those functions will also need to be added.

After all the features have been designed into the back of the house, you will then be ready to start your design work on the front of the house service and beverage preparation area. This area will probably include a pastry case, cash register(s), drip coffee brewer and grinder(s), espresso machine and grinders, a dipper well, possibly a granita machine, blenders, ice holding bin, blender rinse sink, hand washing sink, under counter refrigeration (under espresso machine and blenders), and a microwave oven.

If serving food beyond simple pastries and desserts, you may need to add a panini toaster grill, a refrigerated sandwich/salad preparation table, soup cooker/warmer, a bread toaster, etc. If you plan to serve pre made, ready to serve sandwiches, wraps, and salads, along with a selection of bottled beverages, an open-front, reach-in merchandising refrigerator should be considered. Serving ice cream or gelato? If the answer is yes, then an ice cream or gelato dipping cabinet will be necessary along with an additional dipper well.

Finally, when all the working areas of the bar have been designed, the customer seating area can be laid out. This will, of course, include your cafe tables and chairs, couches and comfortable upholstered chairs, coffee tables, and perhaps a window or stand-up bar with bar stools. Impulse-buy and retail merchandise shelves should be established, and a condiment bar should be located close to where customers will pick-up their beverages.

A quick word about couches, large upholstered chairs, and coffee tables. Living room type furniture takes up a lot of space. If you plan to be opening evenings, and will perhaps serve beer and wine, and having comfortable seating will be important for creating a relaxing ambiance, then by all means do it. But if you have limited seating space, and are not trying to encourage people to relax and stay for long periods of time, then stick with cafe tables and chairs. The more people you can seat, the greater your income potential!

Features from the front door to the condiment bar should be arranged in a logical, sequential order. As your customers enter the front door, their travel path should take them past your impulse-buy merchandise display, and the pastry case, before they arrive at the point of order (where your cashier, cash register, and menu-board will be located). Exposing customers to your impulse items and pastries, before they order, will greatly increase their sales. Then, after the order and payment has been taken, they should proceed down-line away from the cash register to pick-up their beverage, and finally, the condiment bar should be located beyond that point. Be sure to separate your point of order from the point of product pick-up by at least six feet, otherwise customers waiting for their beverage may begin to intrude into the space of those ordering.

Don't make the mistakes that many inexperienced designers commonly make. They arrange these features in a haphazard way, so that customers have to change direction, and cut back through the line of awaiting customers to proceed to their next destination in the service sequence. Or, wanting to make their espresso machine a focal point to those entering the store, they place it before the cashier along the customer's path of travel. Customers inevitably end up trying to order from the barista before they are informed that they need to proceed to the cashier first. If this happens dozens of times each day, confusion and slowed beverage production will be the result.

On the employee's side of the counter, work and product flow are even more important. Any unnecessary steps or wasted movements that result from a less than optimal design will slow down employee production. All products should flow seamlesly in one direction towards the ultimate point of pick-up. For example, if preparing a particular item is a 3-step process, then placement of equipment should allow for the 3 steps to occur in order, in one linear direction, with the final step occurring closest to the point where customers will be served.

Equipment should be grouped together so that it is in the immediate proximity of the employee(s) who will be using it. Beyond the actual equipment, empty spaces must be left on the counter top to store ingredients and small wares (tools) used in product preparation. Counter top space will also be needed where menu items will actually be assembled. Think of the grouping of equipment for different job functions as stations. Try to keep different stations compact and in close working proximity to each other, but make sure that there is enough space between each so that employee working-paths don't cross, which could contribute to employee collisions.

Creating defined work stations will allow you to put multiple employees behind the counter when needed. When it is busy, you may need to have 2 cashiers, another person just bagging pastries and brewing coffee, 2 baristas behind the espresso machine, a maybe even a dedicated person working the blenders. If you're preparing sandwiches and salads to order, then another person may need to be added to handle that task. Keeping your stations in close proximity to each other will allow one employee to easily access all equipment during very slow periods of business, thus saving you valuable labor dollars.

When you arrange equipment in relationship to each other, keep in mind that most people are right handed. Stepping to the right of the espresso machine to access the espresso grinder will feel more comfortable than having to move to the left. Likewise, place your ice storage bin to the right of your blenders, so when you scoop ice, you can hold the cup or blender pitcher in your left hand, and scoop with your right.

As you create your store layout, the equipment you select should fit your space and the needs of your anticipated business volume. A busy location will most likely require a dual or twin, air pot, drip coffee brewer (one that can brew 2 pots at the same time), as opposed to a single brewer. If you anticipate selling a lot of blended and ice drinks, then an under counter ice maker, one that can only produce 100 pounds of ice or less per day, will not be sufficient. You should instead locate a high-capacity ice maker (one that can make 400 or 500 lbs. per day) in the back of the house, and transport ice to an ice holding bin up front. Plan to bring in frozen desserts and ice cream? Then a 1 door reach-in freezer in the back of he house will probably be inadequate for you storage needs, so you'll need to consider a 2 or 3 door. I always recommend a 3-group espresso machine for any location that may generate 150 drinks per day or more. And, I can tell you from experience, you can never have too much dry or refrigerated storage space!

Make sure that any equipment you select will be acceptable with your local bureaucracy before your purchase and take delivery of it. All equipment will typically need to be NSF & UL approved, or have a similar, acceptable, foreign certification equivalent. Your bureaucracy will most likely want to see manufacturer specification sheets on all equipment to verify this fact, before they'll approve your plans.

ADA (American's with Disabilities Act) compliance will also come into play when you are designing your coffee bar. In some areas of the country, this will only apply to those areas of your store that will be used by customers. However, other bureaucracies may require your entire store to be ADA compliant. Following are some of the basic requirements of compliance with the code:

• All hallways and isle ways must be 5 feet wide (minimum).

• All countertop working heights must be 34 inches high (instead of normal 36 inch height).

• 18 inches of free wall space must be provided on the strike-side of all doors (the side with the door knob).

• All hand-washing sinks must be ADA friendly.

• All bathrooms must be ADA compliant (5 foot space for wheelchair turnaround, handrails at toilet, acceptable clearance around toilet and hand washing sink, etc.).

• No steps allowed, ramps are OK with the proper slope.

• If your space has multiple levels, then no feature may exist on a level where handicapped access has not been provided, if that same feature does not exist on a level where it will be accessible.

You can find the complete regulations for ADA compliance at the following website:

http://www.access-board.gov/adaag/html/adaag.htm

Beyond the basic Equipment Floor Plan, showing new partitions, cabinets, equipment, fixtures, and furnishings, you'll need to produce some additional drawings to guide your contractors and satisfy the bureaucracies.

Electrical Plan

An electrical plan will be necessary to show the location of all outlets needed to operate equipment. Information such as voltage, amperage, phase, hertz, special instructions (like, "requires a dedicated circuit"), and the horizontal and vertical location of each outlet, should all be specified.

A small, basic coffee shop might get away with a 200 amp service, but typically 400 amps will be required if your equipment package will include items like an electric water heater, high-temperature dishwasher, or cooking equipment (ovens, panini grill, etc.).

In addition to the electrical work required for your coffee business-specific equipment, you may need to adjust existing electrical for additional or reconfigured lighting, HVAC, general-purpose convenience outlets, and exterior signs. Also, have your electrician run any needed speaker wires, TV/internet cables, and cash register remote receipt printer cables at the same time they are installing electrical wires. Finally, make sure your electrician makes provisions for lighted exit signs, and a battery-powered emergency evacuation lighting system, if needed.

Plumbing Plan

A plan showing all plumbing features will be necessary. At minimum, this should show stub-in locations for all needed water sources (hot & cold), drains, your water heater, water purifications system, grease interceptor (if required), bathroom fixtures, etc.

While a typical P-trap drain should be acceptable for most fixtures and equipment, some will require an air-gap drain. An air gap drain does not go through the "S"-shaped twists of the P-trap. Instead, the drain line comes straight down from the piece of equipment or fixture, and terminates 2 inches above the rim of a porcelain floor sink drain. This porcelain drain basin is usually installed directly into the floor. The air gap between the drain line from your equipment or fixture, and the bottom of the basin, prevents any bacteria in the sewer pipe from migrating into the equipment or fixture. I drain the following pieces of equipment to a floor sink drain when creating a plumbing plan:

• espresso machine

• dipper wells

• ice maker

• ice holding bin

• food prep sink

• soft drink dispensing equipment

To save on the life of your water filtration system, only your espresso machine and coffee brewer should be supplied by with treated water. Coffee is 98% to 99% water, so good water quality is essential. Your ice maker should only require a simple particle filter on the incoming line (unless your water quality is terrible). There is no need to filter water that will be used for hand and dish washing, cleaning mops, flushing toilets, and washing floors!

Be aware that many bureaucracies are now requiring a grease interceptor on the drain line from your 3-compartment ware washing sinks and automatic dishwasher. A grease interceptor is basically a box containing baffles that traps the grease before it can enter the public sewer system.

Also understand that a typical retail space will not come equipped with a water heater with enough capacity to handle your needs. Unless your space was previously some type of a food service operation, you will probably need to replace it with a larger one.

If cutting trenches in the floor will be necessary to install porcelain floor sinks, a grease interceptor, and run drain lines, then establishing a few general purpose floor drains at this same time behind the counter, and in the back of the house, will prove useful. Floor drains will allow you to squeegee liquids away when spills occur, and when washing floors.

Finally, if you added some new walls during your remodel, you may need to have the fire sprinkler system for your space adjusted or reconfigured.

Cabinet Elevations

Drawing cabinet elevations, (the view you would have if you were standing in front of your cabinets), will be necessary for your cabinet maker to understand all the features they will need to incorporate into your cabinet designs.

These elevations are not meant to be shop fabrication drawings for your cabinetmaker, but merely serve a reference, showing needed features and desired configuration. Where do you want drawers, and under counter storage space; and, where do you want cabinet doors on that under counter storage? Where should open space be left for the placement of under counter refrigeration and trashcans? Will cup dispensers be installed in the cabinet face under the counter top? These elevations will provide your cabinetmaker with a clear understanding of all these features.

While your kitchen base cabinets at home are typically 24 inches deep, for commercial applications they should be 30 inches deep, and 33 inches if an under counter refrigerator is to be inserted. Also, when specifying the size of an open bay to accommodate under counter refrigeration, be sure to allow a couple of inches more than the physical dimensions of the equipment, so that it can be easily inserted and removed for daily cleaning.

Dimensions Plan

You will need to create a floor plan showing all the critical dimensions for new partitions, doors, cabinets, and fixtures. This will, of course, help make sure that everything ends up where it is suppose to be, and will be the right size.

A final thought about design; unless the space you will be designing is a clean vanilla shell (meaning, nothing currently exists in the space, except perhaps one ADA restroom), you will have to make sure that all the features that you are considering keeping, will be acceptable with your local bureaucracy. Many older buildings were not designed to present codes. If the business type remains the same (your space was occupied by a food service establishment before you), then some times any non compliant features will be grandfathered-in, meaning you don't have to bring them up to current requirements. But don't count on this! You need to check with your bureaucracies to make sure. More and more I see bureaucracies requiring new business owners to remodel, so that all features are compliant with codes. This means you may have to rip-out bathrooms and hallways, add fire sprinkler systems, and provide ramps where there are steps. Better you know all these things before you begin your store design!

I always tell my consulting clients, that if I produce a perfect design and layout for them, they will never notice... because everything will be exactly where you would expect it to be. Unfortunately, if you create a less than optimal design for your coffee bar, you probably won't realize it until you start working in it. Changing design mistakes or inadequacies after the fact, can be extremely expensive. Not correcting those mistakes may even cost you more in lost potential sales. For this reason, I strongly suggest using an experienced coffee business space designer to create your layout for you, or at very least, to review the design you have created. Doing so will payoff with dividends.

How to Design and Layout a Coffee Shop Or Espresso Bar
4 Slice Toaster

Christmas Sales Black & Decker T4030 4-Slice Toaster 201

Dec 18, 2011 03:03:56

Christmas Black & Decker T4030 4-Slice Toaster Deals
Click for larger image and other views

Black & Decker T4030 4-Slice Toaster

>> Click here to update Christmas prices for Black & Decker T4030 4-Slice Toaster <<

Christmas Sales Black & Decker T4030 4-Slice Toaster Feature

  • 1400-watt 4-slice toaster with cool-touch exterior for safety
  • Extra-wide slots fit bagels, buns, and muffins; self-adjusting guides
  • Electronic push-button controls; frozen, bagel, and cancel options
  • Light-to-dark shade selection; slide-out crumb tray
  • Measures approximately 12 by 11 by 8 inches; 1-year limited warranty


Christmas Sales Black & Decker T4030 4-Slice Toaster Overview

Chrome styling with rich black accents, and must-have features, like frozen, bagel and cancel buttons, and wide slots for lots of toasting options, make our 4-slice toaster a kitchen classic.


SAVE NOW on Christmas Sales Offers below!

Available In Stock.

This Christmas Black & Decker T4030 4-Slice Toaster ships for FREE with Super Saver Shipping.

Price : Click to Check Update Prices Please.

Black & Decker T4030 4-Slice Toaster

Limited Offer Today!! Black & Decker T4030 4-Slice Toaster Christmas and Cyber Monday 2011 Deals

Samsung 32 Tvs Sound Blaster Usb Lcd Video Projector

Bagel and Lox - How to Craft Your Own Slice of Heaven

I was going out for breakfast with Erin about a week ago, and we were unsure as to where to eat. After a pit stop at our local Hassidic bakery for some poppy seed rolls, we decided to get bagels.

4 Slice Toaster

We are, after all, ideally situated, living a block away from either Fairmount or St-Viateur Bagels.

4 Slice Toaster

I've looked around and asked around as to what makes the perfect Bagel and Lox. There are many opinions, but as far as I'm concerned, only one that counts: my own.

So without further ado, here is my recipe for the perfect Bagel and Lox.

Start with a Bagel, either sesame or poppy seed, and cut it with a bread knife, being careful that both halves are of similar thickness.

We are talking here of a PLAIN bagel, not a cinnamon-raisin aberration or anything else of the sort. Ideally, it should have been cooked in the last hour. Do not put in the microwave. I get my bagels at St-Viateur Bagels, but in a pinch, Fairmount would do.

Now, to the cream cheese. Spread a healthy dollop of cream cheese on the bottom half of the bagel, and a thin covering on the top half. There is a reason for that, which I'll come to in a little while. You should be using Philadelphia brand cream cheese, which you left out of the fridge for 10-15 minutes before use, so that it is easier to spread.

Lox. Smoked Salmon. Red Gold. Proof of the existence of G*d. As far as I'm concerned, all lox is good, so get whichever you like most. I buy mine at Costco in large quantities, and I try to purchase Wild Pacific Salmon when I can, but I'm not very picky.

You should put 3 or 4 slices of salmon on the bottom half of the bagel. In a perfect world, the salmon on your bagel should be little less than half an inch thick, but for those on a budget, its perfectly alright to put a little less. What we are looking is the perfect harmony of flavors, and that can be achieved without overplaying any of the ingredients.

Over the lox, you should put onions. I use yellow or white onions, raw of course, cut in rings. I love raw onions, so I usually put quite a bit. Some people use red onions, but I don't like the color, as it clashes with the salmon, and I don't find the taste so fantastic, either. But that's a matter of taste. I would certainly use them if that's all I had.

The perfect bagel and lox combination requires capers. Get a healthy spoonful of capers, and drain as much vinegar as you can. Sprinkle them on the inside of the top half of the bagel, on which you have applied a thin spread of cream cheese. They should stick to the cream cheese and stay in place.

"So I can now close my bagel and lox, and enjoy my little slice of heaven right here on Earth, right?" I hear you ask.

Not quite yet.

Get out your bottle of extra-virgin, cold pressed olive oil, and pour out a little 'filet' over the onions and the lox, and immediately close your bagel and lox sandwich.

You can now cut it in half and enjoy the greatest bagel and lox sandwich that has ever existed. The soft texture and subtle taste of the lox and cream cheese, the bite of the raw onion and the acidity of the capers, the binding velvety exquisiteness of the olive oil... Ah....

In retrospect, to craft the 'perfect bagel and lox sandwich', you will need:

Montreal bagels, uber-fresh and ideally from St-Viateur Bagels Philadelphia Cream cheese ("Light" is OK if you're on a diet) Smoked Salmon, whichever you like best White or yellow onions, raw, cut in rings or slices Capers Extra Virgin Olive OilAnd here's what you will NOT need:

Lettuce. You are not a rabbit. Lettuce has no place in a bagel and lox sandwich. Tomatoes. Tomatoes in this context are a SIN, and not the good (or fun) kind of sin. Cooked or sautéed onions, or mushrooms. That is wrong on so many levels; I'm not even going to get into it. Don't do it. Any bagel that is not sesame or poppy seed. Cinnamon-raisin, whole wheat, onions, and other assorted affronts to Bageldom. You know who you are. I'm not saying you're not tasty and delicious under certain circumstances, but YOU ARE NOT BAGELS, and as such have no place anywhere near lox and cream cheese.

Bagel and Lox - How to Craft Your Own Slice of Heaven
4 Slice Toaster

Christmas Sales Sunbeam 3823-100 4-Slice Wide Slot Toaster, White 201

Dec 16, 2011 16:32:50

Christmas Sunbeam 3823-100 4-Slice Wide Slot Toaster, White Deals
Click for larger image and other views

Sunbeam 3823-100 4-Slice Wide Slot Toaster, White

>> Click here to update Christmas prices for Sunbeam 3823-100 4-Slice Wide Slot Toaster, White <<

Christmas Sales Sunbeam 3823-100 4-Slice Wide Slot Toaster, White Feature

  • Anti-jam mechanism for safety; 4 slice capacity
  • From sliced bread to hamburger buns, extra wide slots allow for a wide range of bread types and sizes
  • Separate toast controls for simultaneous toasting at different settings Electronic Toasting Technology
  • Remove toast easily with our high-rise toast lift
  • Never burn yourself with our Cool Touch¿ exterior


Christmas Sales Sunbeam 3823-100 4-Slice Wide Slot Toaster, White Overview

Jarden 3823-100 Toaster 3823-100 268


SAVE NOW on Christmas Sales Offers below!

Available In Stock.

This Christmas Sunbeam 3823-100 4-Slice Wide Slot Toaster, White ships for FREE with Super Saver Shipping.

Price : Click to Check Update Prices Please.

Sunbeam 3823-100 4-Slice Wide Slot Toaster, White

Limited Offer Today!! Sunbeam 3823-100 4-Slice Wide Slot Toaster, White Christmas and Cyber Monday 2011 Deals

Blu Ray Player Toshiba Car Alarm System

Meals in Minutes

No matter what your schedule, you're going to end up preparing a meal on the run every now and again. I try to keep the ingredients for several quick and easy meals on hand so I'm not in a bind when I'm rushed for time and have to throw a quick meal together. Here are some of my family's favorites:

4 Slice Toaster

TOMATO SOUP AND GRILLED CHEESE SANDWICHES

4 Slice Toaster

I always keep several cans of Campbell's condensed tomato soup and saltine crackers on hand. Just add a can of milk or water to one can of soup and you're in business. My husband prefers his grilled cheese sandwiches prepared with butter in the skillet, but I often leave out the butter completely by first toasting the bread in the toaster oven, adding the sliced cheese, and then microwaving until the cheese melts.

STIR FRY

There are a number of generic frozen stir fries on the market now that are very reasonably priced. I have to pick through them to find a vegetable combination my family likes, but there really are many to choose from. You just add your choice of beef, chicken, pork, or shrimp, and it only takes about 10 minutes to prepare in the skillet. I add a little soy sauce for extra flavor.

SPAGHETTI

I always stock up on jars of spaghetti sauce when they're on sale. I prefer to make my own, but when I'm pressed for time these jars of sauce come in really handy. My family of three only eats about half of the sauce at one time, so I freeze the leftover sauce (the cooked hamburger added), and the next time it just needs to be thawed out and added to the cooked spaghetti noodles. We used to throw away a lot of leftover garlic bread, but I found that especially when we're not planning on having spaghetti ahead of time, toast with butter and garlic powder is a very acceptable substitute. We actually decided we liked the garlic toast better so I don't even bother with the garlic bread anymore. Just add a salad and you have a complete meal.

CHICKEN BURGERS

I often run across frozen breaded chicken patties on sale. These make a great quick meal, any time of the day. They can be eaten alone or on a hamburger bun. Just add mayonnaise, lettuce, and maybe a slice of tomato. We like to eat these with frozen french fries and maybe a jello salad.

Meals in Minutes
4 Slice Toaster

Christmas Sales Back to Basics TEM4500 4-Slot Egg-and-Muffin Toaster 201

Dec 15, 2011 16:21:55

Christmas Back to Basics TEM4500 4-Slot Egg-and-Muffin Toaster Deals
Click for larger image and other views

Back to Basics TEM4500 4-Slot Egg-and-Muffin Toaster

>> Click here to update Christmas prices for Back to Basics TEM4500 4-Slot Egg-and-Muffin Toaster <<

Christmas Sales Back to Basics TEM4500 4-Slot Egg-and-Muffin Toaster Feature

  • 4-slice toaster makes egg-and-muffin sandwiches in about 4 minutes
  • Toasts while steam-poaching eggs and warming pre-cooked meat
  • Egg/toast, toast, and egg functions; hard- or soft-boil up to 8 eggs
  • Dual control panel; bagel and defrost settings; shade control; cord storage
  • Measures approximately 16 by 11 by 8 inches; 1-year warranty


Christmas Sales Back to Basics TEM4500 4-Slot Egg-and-Muffin Toaster Overview

The Back to Basics 4-slot Egg and Muffin Toaster toasts bread, English muffins, bagels or croissants at the same time it steam-poaches the egg and warms the pre-cooked meat. In about four minutes, this multi-function toaster makes a delicious egg and muffin sandwich at home. Also hard- or soft- boils up to 8 eggs at a time.


SAVE NOW on Christmas Sales Offers below!

Available In Stock.

This Christmas Back to Basics TEM4500 4-Slot Egg-and-Muffin Toaster ships for FREE with Super Saver Shipping.

Price : Click to Check Update Prices Please.

Back to Basics TEM4500 4-Slot Egg-and-Muffin Toaster

Limited Offer Today!! Back to Basics TEM4500 4-Slot Egg-and-Muffin Toaster Christmas and Cyber Monday 2011 Deals

Temperature Controlled Soldering Iron

Digital Convection Toaster Oven Offers Cooking at a Touch of a Button

There are many helpful features on a digital convection toaster oven and countless number of people are turning to these countertop ovens in order to save time and money, especially during the summer months when they don't want to heat the entire house to bake a pizza or toast some garlic bread. These digital convection toaster ovens are perfect for making breakfast, lunch, dinner or just a little something for a snack. One of the main attraction to these convection toaster ovens are the big bright digital display counters that keep time when not in use. Another feature is the cooking; convection baking circulates hot air around the food for a more even and faster cooking of food. This 'big little' machines will cook, broil, toast, and reheat food without the 'sogginess' like a microwave. With various temperatures and times, there is a digital convection toaster oven just right for your cooking habits.

4 Slice Toaster

Black & Decker CTO4550SD 6-Slice Digital Countertop Convection Oven with Pizza Bump
This features a heavy-duty stainless steel construction and exterior color. This particular brand of convection oven has one touch technology which means the cooking times have already been established for many common foods and all you have to do is press a button. Frozen snacks, pizza, cookies, potatoes and bagels are all pre-programmed into this digital convection toaster oven. This oven offers a curved, nonstick interior perfect for a casserole, 12" pizza or pan of muffins. There are two positions for the one wire rack; one touch buttons for broil, toast and bake; a toasting cycle; stop and start buttons and 120-minute timer. There is an 'easy-view' glass door and a crumb tray for easy cleaning and it comes with one pizza pan and one baking pan.

4 Slice Toaster

SANYO 6-Slice Digital Convection Toaster Oven
This is a spacious digital convection toaster oven that heats higher than most of its competitors from 140 to 500 degrees and has a timer that is also longer, from one minute to 4 hours. In addition, this convection toaster oven has six different positions for its cooking rack. This machine bakes, toasts, broils, cooks a 12" pizza and defrosts with a push of a button. The convection setting allows for maximum air flow which gives a quicker cooking time for all foods. There are two heating elements which combined give off 1500-watts of cooking power. And if you just want toast, there are six different shades of toast settings.

Euro-Pro TO21 digital convection oven
This is a sleek designed digital convection toaster oven that will consistently deliver perfect tasting food every time. This model will cook evenly and quickly without leaving any 'hot spots' in the food. There are eight different cook settings including - bake, convection broil, dehydrate, cook pause, defrost, broil, convection bake, bake toast. Touch pad digital display with cooking temperatures up to 450 degrees. Will accommodate a 12" pizza with nothing hanging over.

Digital Convection Toaster Oven Offers Cooking at a Touch of a Button
4 Slice Toaster

Christmas Sales T-Fal 4-Slice Digital Toaster, black 201

Dec 14, 2011 15:42:22

Christmas T-Fal 4-Slice Digital Toaster, black Deals
Click for larger image and other views

T-Fal 4-Slice Digital Toaster, black

>> Click here to update Christmas prices for T-Fal 4-Slice Digital Toaster, black <<

Christmas Sales T-Fal 4-Slice Digital Toaster, black Feature

  • Bagel function toasts the inside and gently warms the outside.
  • Defrost function one step toasting of frozen breads.
  • Reheat function warms previously frozen breads with no over toasting.
  • Extra high-lift toast removal for easy removal of small sized breads and English muffins.
  • Extra-wide, self-adjusting slots are ideal for any bread thickness and ensure even toasting.


Christmas Sales T-Fal 4-Slice Digital Toaster, black Overview

T-Fal Digital Toaster - 4-Slice (Black) has a LCD screen with countdown of remaining toasting time. The compact double long slot is ideal for large sized breads while saving space. There is a 1-8 variable browning control for desired browning quality.


SAVE NOW on Christmas Sales Offers below!

Available In Stock.

This Christmas T-Fal 4-Slice Digital Toaster, black ships for FREE with Super Saver Shipping.

Price : Click to Check Update Prices Please.

T-Fal 4-Slice Digital Toaster, black

Limited Offer Today!! T-Fal 4-Slice Digital Toaster, black Christmas and Cyber Monday 2011 Deals

Fat Loss Supplement

German Potato Salad - 3 Tasty Recipes

If you like potato salad, or are tired of the same old thing, you should try German potato salad. It has a bite that normal potato salads just don't have, and is usually served warm. Here are 3 of my favorite German potato salad recipes for you to try.

4 Slice Toaster

German Potato Salad I

4 Slice Toaster

Ingredients:

2 or 3 pounds potatoes, cut in 1 inch pieces
1/2 pound bacon
1 small onion, chopped
4 medium sweet pickles, chopped fine
4 boiled eggs, chopped
3/4 teaspoon salt
1 teaspoon black pepper
1 teaspoon celery seed
1 tablespoon sugar
4 tablespoons vinegar (apple cider vinegar works best)

Preparation:

1. Peel potatoes and cut into 1" pieces. Cook in boiling water until done. Drain.

2. While potatoes are boiling, chop eggs, pickles and onions. Add salt, pepper, celery seed, sugar and vinegar. Mix well.

3. Slice bacon into small pieces and cook until well done, or slightly crisp. Drain off most of the fat.

4. Add potatoes and bacon to egg mixture. Mix gently to coat potatoes, being sure not to crush them. Serve warm or cold.

German Potato Salad II

Ingredients:

5 medium potatoes
4 hard boiled eggs, sliced
4 slices bacon
1 small onion, diced
1 tablespoon all-purpose flour or cornstarch
1 1/2 teaspoon salt
1/3 cup sugar
1/3 cup vinegar
1/3 cup potato water

Preparation

1. Peel potatoes and slice in 1/4" thick slices. Cook in boiling water until done, but not soft. Drain, reserving 1/3 cup of the water.

2. Slice eggs and dice onion. Set aside.

3. Cut bacon into small pieces. In a large pan, cook bacon until done. Remove bacon, leaving drippings in pan.

4. To the drippings, add the flour, stirring well. Add salt, vinegar, sugar and potato water. Stir well and cook until slightly thickened.

5. Add potatoes, eggs, onion and bacon to thickened sauce. Mix until potatoes are covered in sauce. Serve warm.

Hot German Potato Salad

Ingredients:

9 medium potatoes, cut in 3/4 inch pieces
6 slices bacon, sliced small
1 medium onion, chopped onion
2 tablespoons all-purpose flour
2 tablespoons sugar
2 teaspoons salt
1/2 teaspoon celery seed
1/2 teaspoon black pepper
2/3 cup potato water
1/3 cup vinegar

Preparation:

1. Peel potatoes and cut into 3/4" pieces. Cook in boiling water until done. Drain, reserving 2/3 cup water.

2. In a large skillet or pan, fry bacon that has been cut into small pieces until crisp. Remove bacon from pan.

3. Cook chopped onion in bacon drippings until tender and golden brown. Stir in flour, sugar, salt, celery seed, and pepper. Cook over low heat and stir until bubbly.

4. Remove from heat and stir in potato water and vinegar. Stir until smooth. Return to heat and bring to a boil, stirring constantly. Continue to cook and stir for 1 minute or until thickened. Reduce heat to low.

5. Stir potatoes and bacon into hot mixture, being careful not to smash the potatoes. Heat through, stirring gently to coat potato slices. Serve hot.

German Potato Salad - 3 Tasty Recipes
4 Slice Toaster

Christmas Sales Waring Pro WT400 Professional 4 Slice Toaster, Brushed Stainless Steel 201

Dec 13, 2011 15:13:11

Christmas Waring Pro WT400 Professional 4 Slice Toaster, Brushed Stainless Steel Deals
Click for larger image and other views

Waring Pro WT400 Professional 4 Slice Toaster, Brushed Stainless Steel

>> Click here to update Christmas prices for Waring Pro WT400 Professional 4 Slice Toaster, Brushed Stainless Steel <<

Christmas Sales Waring Pro WT400 Professional 4 Slice Toaster, Brushed Stainless Steel Feature

  • Adjustable shade control and cancel function
  • Defrost and Bagel LED indicator lights
  • Commercial-style brushed stainless steel housing
  • Self centering 1.3 inch wide toasting slots with removable crumb tray
  • High-lift carriage feature


Christmas Sales Waring Pro WT400 Professional 4 Slice Toaster, Brushed Stainless Steel Overview

Now you can enjoy English muffins, toast, breakfast toaster pastries- even bagels- toasted to perfection, thanks to the self-centering toast slots, adjustable shade control and the special Bagel control that toasts on just one side. Designed with 1.3"- wide toasting slots, this toaster is ideal for thick slices of artisanal breads. Watch frozen items like waffles or bread heat up in a flash with the Defrost function. The high-lift carriage feature means you never have to struggle to remove your toast, and the removable Crumb Tray makes cleaning a breeze. Commercial-style brushed stainless steel housing fits into even the most sophisticated kitchen!


SAVE NOW on Christmas Sales Offers below!

Available In Stock.

This Christmas Waring Pro WT400 Professional 4 Slice Toaster, Brushed Stainless Steel ships for FREE with Super Saver Shipping.

Price : Click to Check Update Prices Please.

Waring Pro WT400 Professional 4 Slice Toaster, Brushed Stainless Steel

Limited Offer Today!! Waring Pro WT400 Professional 4 Slice Toaster, Brushed Stainless Steel Christmas and Cyber Monday 2011 Deals

Projector 4000 Good Home Theater Speakers

Lamb Shish Kabob Armenian-Style

This recipe for lamb kufta comes from the Armenian community and shows off the distinct and flavorful lamb meat in an easy-to-serve shish kabob. Lamb is a nutritious meat, high in iron, zinc, and B vitamins. Lambs in the United States free range on grass prairies making lamb the ultimate in eco-friendly meat as well.

4 Slice Toaster

Lamb Shish Kebob, serves 8

4 Slice Toaster

Ingredients
3 pounds of lamb
1 large onion
1/4 cup finely minced fresh parsley
1/2 cup light olive oil
1 cup red wine
3 cloves of freshly minced garlic
10-12 large mushrooms
1 large onion (for skewers)
1 large bell pepper

Marinate overnight
Trim and cube a leg of lamb into 2" cubes. Save the bones for broth making. Mix together a marinade of the onion, parsley, olive oil, red wine, and garlic. Combine the meat and marinade in a glass container. Stir well to coat the lamb. Cover and refrigerate overnight. Skewers
Clean 10-12 large mushrooms. Cut 1 large onion and 1 large bell pepper into 10-12 pieces each. Drain the lamb. Set out the onion and pepper, mushrooms, and meat on a large platter or cutting board. This is your work surface for putting together the shish kebabs. Alternate the lamb on the skewer with a pepper, onion, or mushroom so that a vegetable is between each piece of lamb. Begin and end your skewer with the meat -- it will stay on the skewer better. Grill the shish kebob on your barbecue or broil in your oven until done. Grill them for 6-7 minutes, turning several times. Broil them for 3-4 minutes on each side. Salt immediately. Serve with a side grain such as quinoa and a green salad

Lamb Shish Kabob Armenian-Style
4 Slice Toaster

Hd Ready Projector Cheese Slicer Protein For Bodybuilding

A Simple Chicken Feet Delicacy - Chicken Feet Kerabu (Chicken Feet Salad)

Although eating chicken feet is an acquired taste, those who love to eat chicken feet will swear by it. It is a delicacy in its own right. Chicken feet can be cooked in many ways. Popular ways of cooking chicken feet are stew and boil. Usually most people prefer the fried chicken feet for their dishes. However, I would like to share another not so common but healthy chicken feet dish. This is a delicacy which is popular in local eateries. Although it looks complicated, it can be prepared quite easily at home. It is an appetizer and is eaten cold. Here the dish need boneless chicken feet. One has to be skillful to take out the bones from the feet. If you are not sure how to debone , get the boneless chicken feet in wet markets or supermarkets.

4 Slice Toaster

Ingredients:

4 Slice Toaster

500 gm boneless chicken feet

30 gm lemon grass

3 red chillies

6 small chillies (cilli padi)

1 bunga kantan (known as Torch Ginger in English and Etlingera elatior in Latin)

4 limes, juiced

salt and sugar to taste

Method:

Shred the boneless chicken feet into bite size. Blanche the chicken feet in boiling water, drain and set aside. Slice finely the lemon grass, red chillies, cilli padi and bunga kantan. Sprinkle evenly on to the chicken feet. Mix all ingredients with the lime juice before serving. Kerabu may be served chilled or at room temperature.

If you love chicken feet dishes, Mary Ly is sharing a lot of simple but delicious recipes in her blog at http://www.simplecookingideas.com

A Simple Chicken Feet Delicacy - Chicken Feet Kerabu (Chicken Feet Salad)
4 Slice Toaster

Christmas Sales Breville Lift and Look Touch Toaster 201

Dec 11, 2011 12:24:31

Christmas Breville Lift and Look Touch Toaster Deals
Click for larger image and other views

Breville Lift and Look Touch Toaster

>> Click here to update Christmas prices for Breville Lift and Look Touch Toaster <<

Christmas Sales Breville Lift and Look Touch Toaster Feature

  • Motorized carriage with push button controls
  • One touch a bit more
  • One touch motorized lift and look
  • Adjustable browning control
  • LED toasting progress indicator


Christmas Sales Breville Lift and Look Touch Toaster Overview

Motorized one-touch technology. Mechanized lowering for gentler handling. Consumer research led designers to add A Bit More browning and the Auto Lift and Look features. Bagel setting knows to toast only on the inside. Sleek, modern, premium plastic housing accents your kitchen with style. Extra-long and wide slots for artisanal breads, bagels, and pastries. Front pull-out for no-lift cleaning.


SAVE NOW on Christmas Sales Offers below!

Available In Stock.

This Christmas Breville Lift and Look Touch Toaster ships for FREE with Super Saver Shipping.

Price : Click to Check Update Prices Please.

Breville Lift and Look Touch Toaster

Limited Offer Today!! Breville Lift and Look Touch Toaster Christmas and Cyber Monday 2011 Deals

1080P Samsung